


Tongue and Groove Cedar Ceiling Boards: Clear vs Tight Knot and 1x4 vs 1x6

A tongue and groove cedar ceiling can look simple once it is finished. Ordering the boards is the part that deserves more thought. Grade, board width, joint profile and actual face coverage all affect the appearance, quantity and cost.
There is no single best cedar ceiling board. Clear 1x6 may suit a restrained great-room ceiling, while tight-knot 1x4 may fit a covered porch or cottage where more grain and more joint lines are welcome. Start with the room, its scale and the expected viewing distance.
What are you buying when you order T&G cedar?
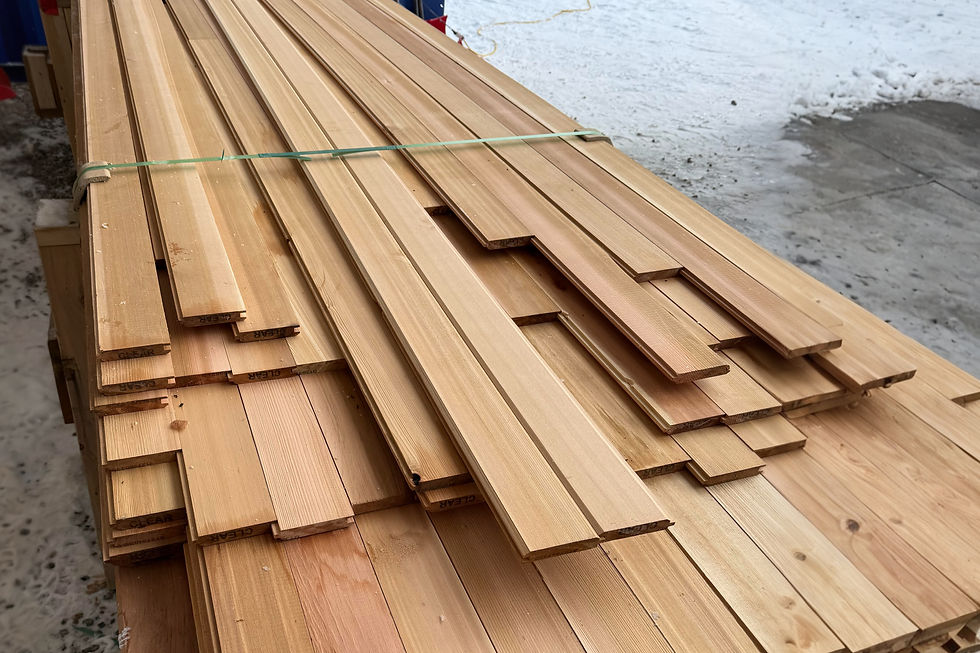
Tongue and groove boards have a projecting tongue on one edge and a matching groove on the other. The pieces interlock, which helps align the face and creates a continuous panel. The joint may form a V, a square reveal, a flush line or another milled detail.
Quality Cedar Products groups its available profiles in the tongue and groove cedar collection. If the basic terminology is new, read What Is Tongue and Groove Cedar? before comparing grades and widths.
The nominal label is only the starting point. A nominal 1x6 board is not six inches wide after milling, and the tongue is not part of the exposed face. Always order from the stated face coverage on the quote or product sheet.
Clear cedar or tight-knot cedar
Appearance: Clear cedar: Fewer visible natural characteristics; calmer and more uniform; Tight-knot cedar: Visible sound knots and stronger colour and grain variation
Typical design fit: Clear cedar: Modern interiors, formal rooms, detailed soffits and close-view applications; Tight-knot cedar: Cottages, porches, cabins and rooms where natural variation is part of the design
Sorting on site: Clear cedar: Sort mainly for colour and grain flow; Tight-knot cedar: Sort for knot distribution, colour and the most visible faces
Budget: Clear cedar: Higher material cost in most markets; Tight-knot cedar: Usually the more economical appearance option
What to inspect: Clear cedar: Colour range, grain orientation, machining and any permitted characteristics; Tight-knot cedar: Knot soundness, machining around knots, warp and the overall range within the bundle
Quality Cedar Products lists clear cedar T&G boards in several nominal widths for projects that call for a more uniform appearance. 1x6 tight-knot cedar T&G uses the same type of interlocking joint while allowing more knots and colour variation.
Clear vertical grain is a more specific appearance choice. Its straighter grain can make a ceiling feel especially orderly, but it carries a premium. Use it where the grain direction will be noticed, such as a low soffit, entry ceiling or carefully detailed interior. The 1x6 vertical grain clear cedar T&G page shows the product details.
1x4 or 1x6 for a cedar ceiling?
Board width changes the rhythm of the ceiling. Narrower boards create more lines. Wider boards create fewer lines and allow the grain to read in broader bands.
Choose 1x4 when
The ceiling is small or broken up by beams, skylights or several corners
You want a finer, more traditional pattern
The layout includes curves or short runs where narrower stock is easier to compose
More joint lines suit the scale of the room
Choose 1x6 when
The ceiling is broad and uninterrupted
You want fewer joints and a quieter field
Installation speed matters on a large area
The wider grain pattern suits the architecture
Width alone does not determine perceived quality. A well-sorted tight-knot 1x4 ceiling can look deliberate, while a poorly laid out clear 1x6 ceiling can look patchy. Mock up several boards together and view them from the normal distance before approving the order.
V-joint or nickel gap?
A V-joint creates a fine angled groove where boards meet. It is a familiar choice for cedar ceilings because it gives the joint definition without a broad dark line. Nickel gap produces a flatter face with a square, consistent reveal. It reads more modern and makes spacing part of the design.
The Western Red Cedar Lumber Association's indoor tongue and groove paneling guide shows how V-shaped, flush and reveal joints change the shadow pattern. Use the same profile throughout a continuous ceiling unless a planned transition makes the change intentional.
Match the board to the location
Interior living spaces
Colour consistency, grain and joint layout usually matter most indoors. Clear or vertical-grain cedar suits a restrained interior. Tight-knot cedar works when the room can carry more pattern. Confirm any fire-resistance or finish requirements for the ceiling assembly with the designer or building official; decorative cedar does not replace a required rated assembly unless the approved design says it does.
Covered porches and exterior soffits
A covered exterior ceiling still sees temperature and humidity swings. Product condition, acclimation, finish and ventilation deserve attention. Browse the dedicated cedar soffit products if the ceiling is part of an eave or roof assembly.
Saunas
Sauna interiors place different demands on material selection and detailing. Use smooth, suitable stock and follow the sauna design and heater manufacturer's instructions. Quality Cedar Products lists T&G, clear boards and other stock under cedar sauna materials.
How much tongue and groove cedar do you need?
Start with the net ceiling area, then convert that area using the actual exposed face of the selected board. A simple linear-foot estimate is:
Linear feet = ceiling square feet x 12 / exposed face coverage in inches
For example, a 200-square-foot ceiling using a board with 5-1/8 inches of face coverage requires about 468 linear feet before waste. At a 10 percent allowance, the order would be about 515 linear feet. Use that figure for preliminary ordering only. Vaults, diagonal layouts, short boards, end matching, openings and the required length mix can change the allowance.
Do not calculate from a nominal six-inch width. On 200 square feet, that shortcut would under-order the material.
Plan the layout before delivery
Decide which direction the boards will run, where the first and last boards will land, and how butt joints will be supported. On a vaulted ceiling, settle the ridge, beam and perimeter details before cutting the field boards. If random lengths are supplied, make a length plan so joints look intentional rather than clustered.
Cedar also needs to adjust to its installation environment. Real Cedar's indoor preparation guidance recommends acclimating material to the room's humidity and gives different time ranges for kiln-dried clear, dry knotty and green cedar. Keep the boards dry, flat, supported and ventilated while they acclimate.
Finish decisions should be made on samples
Some owners leave an interior cedar ceiling unfinished to keep its natural texture and scent. Others use a clear or lightly tinted finish to slow colour change or coordinate the ceiling with other woodwork. Exterior and high-moisture locations need finishes approved for that exposure.
Test the complete finishing schedule on offcuts from the actual order. Cedar colour varies, and a finish can deepen the contrast between earlywood, latewood and knots. A small store sample rarely predicts a full ceiling.
What to include in a cedar ceiling quote
Ceiling area and a sketch showing dimensions, slopes and openings
Interior, soffit, covered porch or sauna application
Clear, vertical-grain clear or tight-knot grade preference
Nominal board width and required profile
Actual exposed face coverage
Preferred lengths and whether end joints are acceptable
Smooth or textured exposed face
Finish plan and whether prefinishing is required
Delivery location, access and project timing
Waste allowance and extra boards for future repairs
Send those details through the Quality Cedar Products quote form. A clear specification makes it easier to compare 1x4 and 1x6 options without overlooking coverage or grade differences.
Technical note. This article provides general purchasing and layout information. Installation, fire protection, ventilation, fastening and moisture-control details should follow the approved project design, current requirements and qualified professional advice.


The controls are easy to learn, but finishing later stages takes real precision. Drive Mad https://drivemadgame.cc/ has that "one more try" feeling without becoming frustrating.